300x250 AD TOP

PageRank

Welcome to Black splat

Blogroll

Total Pageviews

About

Music

M Shehroz. Powered by Blogger.

Followers

About Me

Followers

Featured Posts

Showing posts with label Rats And its Setup. Show all posts

Tuesday, 26 November 2013

Tagged under:

How To Setup BlackShades NET 4.2 | No-IP | Portforward | Noob Friendly | Pictures

How To Setup BlackShades NET 4.2

In this tutorial I will teach you the following:
>How to setup No-Ip
>How to download and setup BlackShades NET 4.2 (cracked)
>How to port-forward (WITHOUT uTORRENT OR LOGGING INTO THE ROUTER!)

Things you will need in this tutorial:
>No-IP DUC Client | Download Here
>BlackShades NET 4.2 (cracked) | Post here and pm me for mediafire download link
>Albertino's Port Mapper | Download Here

Setting Up Your No-IP

Step 1) Go to No-IP.com and sign up for a free account (If you already have an account then login and skip this step). Fill in all your details and proceed to activating your account.


How To Setup BlackShades NET 4.2 | No-IP | Portforward | Noob Friendly | Pictures


Step 2) Once you have activated your account. Click Hosts/Redirects in the top left corner of the screen, and click "Add a Host".


Step 3) All you have to do here is enter anything you want for your Hostname. You can then continue to scroll down and click "Create Host".


Step 4) *You can now close out of the No-IP website* Open up your No-IP DUC Client and sign in using your No-IP login. Once the client loads up, choose "Select Hosts" and check the box next to the host you just created. You can then save and close the No-IP Client.


Downloading And Setting Up Your BlackShades NET 4.2

Step 1) Download and extract BlackShades NET 4.2.

Step 2) Open up the BlackShades folder and open loginServer.exe.


Step 3) You can then minimize the fake loginServer and continue to opening "client.exe". You can then type any Username you would like and connect.


Step 4) Once the BlackShades client has opened up, choose the "Settings" tab at the bottom of the client.


Step 5) On this tab, choose what port's you would like for your Connection and Transfer port's (I usually go with 3460 for my connection port and 3461 for my transfer port) You should then activate each port.
*Please note that you must port-forward both the connection port and the transfer port*


Step 6) Now choose the "Create Server" tab at the bottom of the client.


Step 7) Double click the profile "default"

Step 8) These are the settings I suggest using for your BlackShades server:


Step 9) Build your server. You can find your server saved in the BlackShades folder that contains all the files.

*Now whoever opens your BlackShades server will be added under your "Connections" tab (after you've port-forwarded)*

Port-forwarding Without uTorrent or Logging Into Your Router 

Step 1) Open Albertino's Port Mapper

Step 2) Once it finds your router, press the + button at the buttom right to add a port you would like to port-forward.


Step 3) For the local port, add which port you would like to portforward. And the public port should be the same as the local port.
Now make sure both TCP and UDP are ticked.
You can add a description if you want.


Step 4) Repeat step 3 for your second port.

Step 5) Wait for the lights to turn green and your ports have successfully been forwarded!


*You can check to make sure your ports are open at canyouseeme.org*

We are now done! You can now successfully use Blackshades and all it's features it has to offer! If you need any help or have any questions, pm me or post below.

Credits:


Tagged under:

Hack Computer With Prorat Tutorail

Aslam-o-Alaikum From HaCkInG 'O' sHiT
Tools made of Turkey is very unusual, this tool is used to infiltrate other people's computers. The trick is very simple and easy, we live to know the IP and port the victim's computer, then we can directly infects.

prorat download here


A. How to use ProRat 

1. First time we have to know in advance the IP and Port victims open. We can do it by hand or even with the help of Ports Scanner.


Hack Computer With Prorat Tutorail


From the picture above we know all of the computer's IP port is active and which are open. Who will be the victims in our experiment this time is a computer with the IP 192.162.10.233.

2. The next step is we run ProRat, these tools can be downloaded at http://www.prorat.net. Before you turn the first Anti Virus (disabled), because ProRat will be detected as a virus. Though he's not harmful to your computer. After that, fill in the form the victims IP IP and port (default 5110).


When we click on the Connect button to connect the victim's computer can not, because we have not the victim's computer infection. To infect the victim's computer we first create a server that will run on the victim's computer. I click the Create button - Create ProRat Server. Then Notifications appear:


Tick ??the option Use Proconnective Notifications and enter the IP (DNS) IP address with us. In the General Settings tab we enter the Server Port (default 5110), and Victim Name Server Password.


In the Bind with File tab we can smuggle a file that will be run jointly Server. Free file extension.


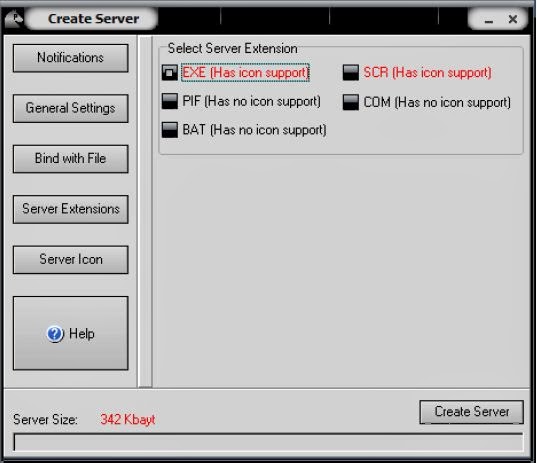
Next is the Server Extensions tab, there are several options server extension. We select the 
extension. Exe.


To make our server icon Icon Click the Server tab, select whatever icon you want.


The final step of making this server is click Create Server.


Once successful, will appear:


3. We just run the Server dikomputer victims. The trick is up to you ... want to secretly infiltrated or using Social Engineering techniques and you can also infeksikan directly on the computer (if biased sihh).
4. Once the server is successfully running on the victim's computer, then we immediately try to connect to it with our computer.
5. For the connection we can use ProConnective or directly typing in the IP address and port the victim's computer. ProConnective is innate tools of ProRat that serves as a bridge (bridge connection) between the client computer and the server computer (the victim). IP will appear on the victim if he was.


6. After successfully connecting to the victim's computer, the status of ProRat will change from Disconnected to Connected


Well ... it's time we play. There are many things we can do on the computer to find out information from the victims such as PCs, send error message, turn off the computer, locking the mouse, open the CD-ROM or even photographing the victim's face.


8. Now we will see the PC information of victims:


From the picture above we can see the information held on the victim's computer.
9. We also can send fake error messages to the victim's computer:


10. install a keylogger


11. And most exciting is to see the face of the victims that we hack.


How exciting is not it? It's still a fraction of the usefulness ProRat many more other functions, such as the victim's hard drive formatting, mess registry, steal critical data, and so forth. However, in our discussion this time we both ends meet so, yes. Ok!
Use well yeah ...

B. Prevention Method
1. Always update your Anti-Virus to be able to detect the presence of infection ProRat. ProRat server usually detected as
Trojan.Dropper.Prorat.DZ.29, Dropped: Backdoor.Prorat.DZ.
2. Fit Anti ProRat, you can download it at www.softpedia.com / get / Antivirus / Anti-prorat.shtml.
Tagged under:

How To Hack Computer With Cybergate

Aslam-o-Alaikum To all Friends Today i Gonna Show u How to Hack your friends computer using Cybergate !!!

1) Download the Software Cybergate
2)Install Cybergate.
3)After Installation it will ask you for the Password.
Default Password: cybergate


How To Hack Computer With Cybergate


4)Once you have put the password, Click on Login.
You will get the message
CyberGate Station is now unlocked and fully functional.
5)After that Click on control Center ==>Start


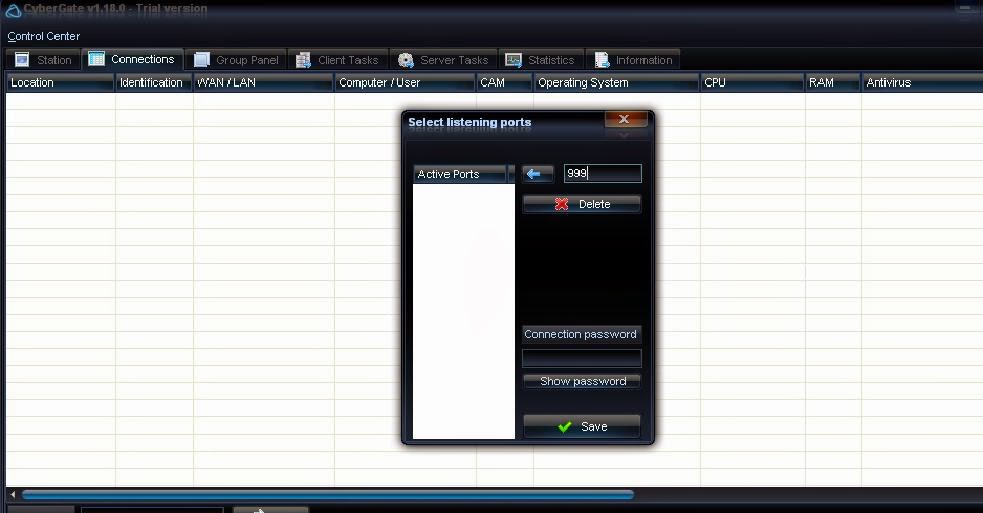
It will Ask you for the Port Number. You can assign any Port number from 0 to 65535.But remember don't assign well known Ports like 80,21 etc..
6) Once You have Assign the Port Number ,Go to Control Center ==>Builder==>Create Server 


7) N0w Click To Add :p


After that you will need to add your IP Addresswith the Port number you have add before.
Eg: 192.168.1.1:999
To get You IP address go to Run==>cmd==>>ipconfig Like This


8)Once you have Added the IP address and Port number go to Installation Tab . 


Here you will get Different Option.
=>Installation Directory :
Now Select any one option. where you want to infect your trojan in your Friends computer .
=>Boot:
Select Registry option also .
Always Select the Random keys for Active Setup and Mutex.
=> Inject Into:
Mostly Select the Default Browser.
9)Now go to Message Tab:


10)Now go to Keylogger Tab:


11)Now Directly Create Server:


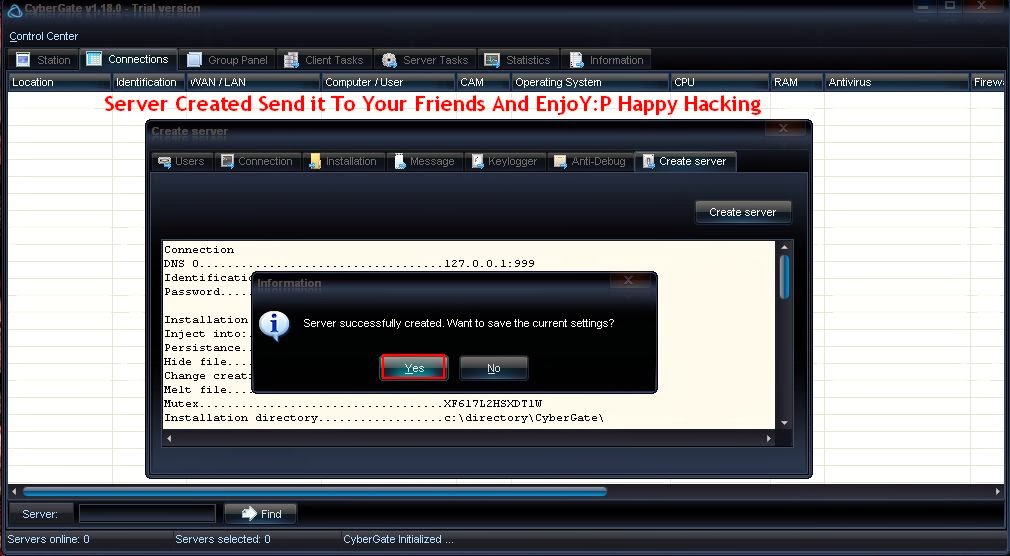
Click on Create Server and Save you File ..


After that just give this file to your Friend and when he click on that File you will get the access of his system.
You can download his files at your End.If the Person is having the Webcam you can access it..That's you are Having the Total Control of his System.Hope U Like it
Note: You will maintain the Access till you have the same IP assign to your Computer.. 
 If U Face Any Problem Just Comment Below